Getting started on VMCloud
Last updated: 04/03/2022
This documentation is under development, therefore it may not be complete or have incorrect information and it will be regularly updated.
This guide will show you how to create your first virtual machine on VMCloud.
Before starting
First of all you need to have access to VMCloud. If you do not have access to a project through https://vmcloud.tecnico.ulisboa.pt/ with your Tecnico ID, then your user is not assign to any project. If that is the case, head over to Requesting Access to learn how to request access and resources.
NOTE: The Tecnico IT team only offers support on issues found during use, not on how to use it, and the team does not have any access to the virtual machines created. If a user does not know how to use the platform, then this guide must be fully read and if there are additional doubts, the user may contact the Tecnico IT team but there is no guarantee of a fast response, as it is not a priority.
First use
VMCloud does not offer backups on your instance or volume data. Although we have not experienced any loss of data so far, you should beware of it. Like any backup procedure, it should never rely on one location, so to backup your data, create copies of it in different locations.
Additionally, instances do not have redundancy or high availability, we do not guarantee 100% uptime, therefore if there is a rare service malfunction, the instance might lose network connectivity or be shutdown/restarted.
There are two ways of accessing VMCloud: web interface or API. Note that the API use is only available if requested, as mentioned in the previous section. As using the API is considered more of an advanced use, this guide will only focus on using the web interface. The web interface is available in https://vmcloud.tecnico.ulisboa.pt/ and authentication is done with Tecnico ID.
When you first login, you are presented with the available quota of your default project.
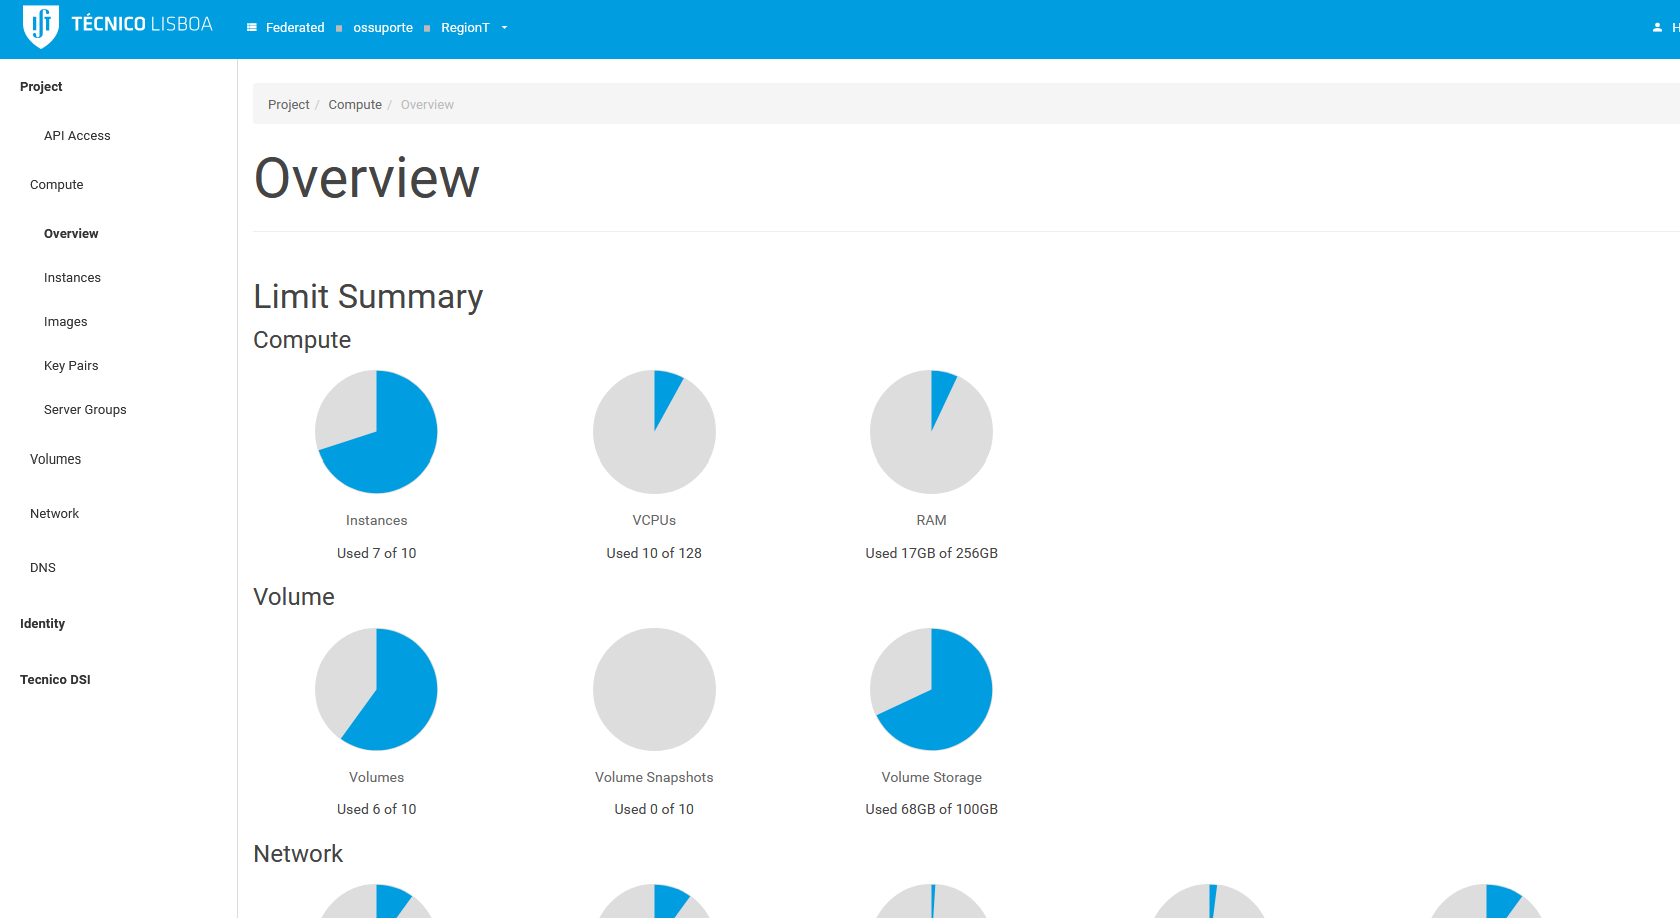
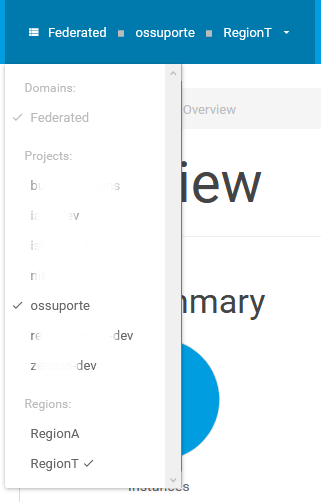
If no quota is available at first (i.e several “Used 0 of 0”), click on the upper bar to change to the correct region. You can also change the used project here.
Before launching an instance
By default, most of the operating system images available on VMCloud do not have a default password, therefore you will need a SSH key pair to access a virtual machine. On the left side bar, click on Compute -> Key Pairs and here you can manage your key pairs.

If you already have a SSH key pair, upload your public key with the Import Key Pair option. Otherwise, create a key pair with the Create Key Pair option and download the private key that will be later used for remote access.
If you decided to generate a new key pair, make sure the downloaded private key has the correct permissions. In Linux or MacOS systems, open a terminal in the location of the private key and run:
chmod 600 [private-key-name].pem
In Windows systems, this procedure may not be necessary.
After creating a key pair or uploading your public key, you should see it listed on the Key Pairs page.
Multiple key pairs can be created or uploaded however only one can be chosen when creating a virtual machine. Note that a key pair belongs to an individual user and to use the same key with several users, then each user has to upload the key on the VMCloud portal to launch instances with that key.
Launching an instance
To launch a virtual machine, on the left side bar click on Compute -> Instances to list the instances of the selected project and click on the Launch Instance button.

The following window will appear:
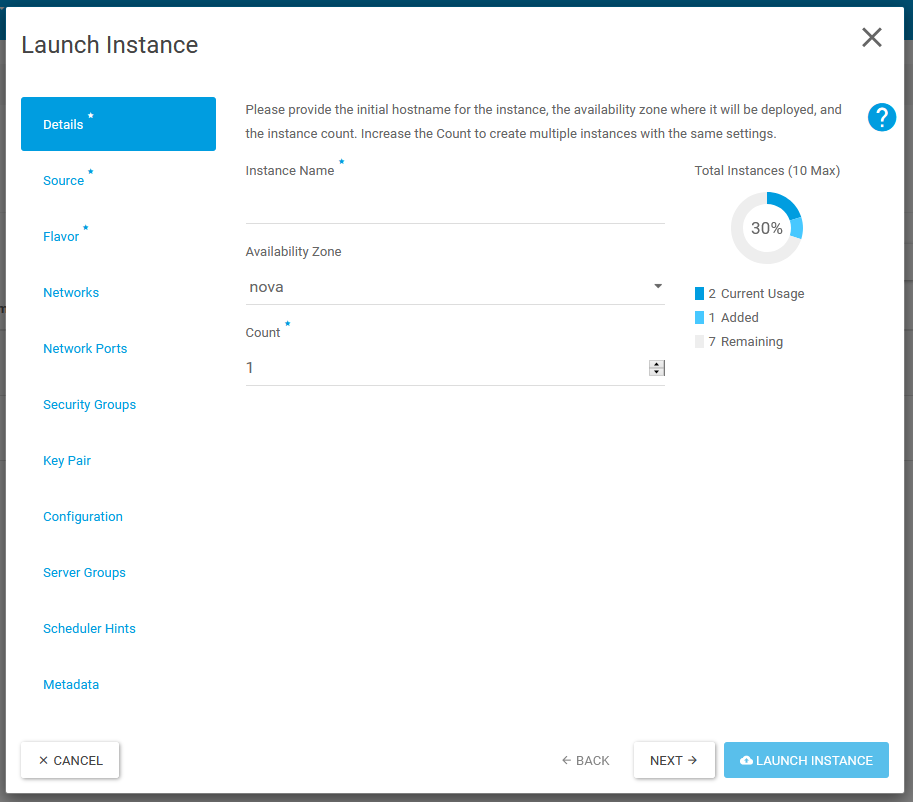
Name your instance and go through the several tabs on the left. You may note that some tabs have a * next to its name, this means these tabs have required options that have to be selected, the remaining options are optional.
In the Source tab, you can select different boot sources. In order to boot a fresh instance, select Image as the boot source.
In the Available section, choose what operating system to boot, for instance Ubuntu-Focal-Latest. The available operating systems are also listed on the Images page.
If you wish to customize the disk size, enter the desired size in GB in the Volume Size (GB) field. To better understand and manage storage on VMCloud, read the Storage page.
In the Flavor tab, select the flavor with the specifications you desire and suitable for the available project quota. Note that the Total/Root/Ephemeral Disk values of the flavor are ignored when the Create New Volume option is enabled on the Sources tab, the aforementioned Storage page explains this aspect in detail.
In the Key Pair tab, confirm that your key pair was allocated and then you can now click on Launch Instance to create your first virtual machine!
You can see the creation progress on the Compute -> Instances tab. Also, you can click on the instance name to get more details and check the graphical output on the Console tab.
Before logging in
When your instance is ready, it’s time to login into the machine. As previously mentioned, most of the operating system images available on VMCloud do not have password-based login, therefore it is not possible to login through the console and remote access is done with ssh using the private key of the indicated key pair.
You will need to check the Images page to know what is the default user of the image you selected. For the Ubuntu-Focal-Latest example given above, the default user is ubuntu.
Your machine is accessible through the IP addresses presented on the instance page. By default, each instance has two IP addresses, one is IPv4 (100.6x.xxx.xxx) and the other IPv6 (2001:0690:2139:xxxx:xxxx:xxxx:xxxx:xxxx).
IPv4 addresses of the 100.6x.xxx.xxx format are private, which means they are only accessible from the Tecnico network. If your workstation is not physically present at any Tecnico campus, then you will need to connect to the Tecnico VPN to connect to your instance. More information on the VPN service here.
Additionally an auto-generated DNS record exists for each instance, which has the following form:
[Instance Name].[Project Name].[tp/al].vps.tecnico.ulisboa.pt
[Instance Name]- Name given to the instance.[Project Name]- Name attributed to the project where the instance was created.[tp/al]-tpfor an instance created in regionRegionToralinRegionA.
Example: server1.dallas.tp.vps.tecnico.ulisboa.pt
Logging in
On your workstation, open a terminal and establish a ssh connection. For example:
ssh -i privatekey.pem -4 ubuntu@server1.dallas.tp.vps.tecnico.ulisboa.pt
The -i flag indicates the path of the private key and the -4 flag forces IPv4 connection, since only IPv4 SSH connections are enabled by default, this is explained in the following section.
After the instance is created
You are now free to use your virtual machine. There are more options to explore on VMCloud to further enhance your use of it.
Security Groups (similar to firewall)
VMCloud provides security groups, which are sets of IP filter rules, and acts similar to a firewall. You can manage them on Network -> Security Groups.
By default, the default security group is automatically selected on every instance creation. This group allows:
- All outgoing IPv4 and IPv6 traffic;
- All incoming traffic from instances with the same security group;
- All incoming ICMP and SSH (TCP - Port 22) IPv4 traffic.
You can add new rules to this group or create a new security group with specific rules and attach it to existing or new instances. Additionally multiple security groups can be attached to the same instance.
If you are having issues accessing specific ports on your instance, always check the rules of the security group(s) attached to the instance, you may find your solution there. To learn more about Security Groups, go to Security Groups.
External Network Access and Floating IPs
As previously mentioned, by default, VMCloud projects have private IPv4 addresses. If you need access to your instance from outside the Tecnico network and the use of the Tecnico VPN is not possible, then contact us at si@tecnico.ulisboa.pt requesting a floating IP for your project, which is essentially a public IPv4 address that can be associated to any instance at any given time. Additionally, you can indicate a name for the floating IP, as a DNS record will be created automatically with the following form: [name].vps.tecnico.ulisboa.pt. After being allocated a floating IP, go to Floating IPs to learn how to use floating IPs.
More options
- If you want to use the API, follow the How to access VMCloud via API? guide to have the correct credentials.
- To learn more on how to choose the best storage option for future instances, please read How storage works?.
- More advanced documentation is available here.