How to access VMCloud via API?
Last updated: 04/03/2022
Tecnico users access VMCloud via Tecnico ID however it is not possible to use the VMCloud API with the Tecnico ID credentials. Therefore an API key can be created for each project.
If you are an external user, then you can directly use the credentials provided to you and skip to the How to use the API? section.
How to get the API key credentials?
- Access https://vmcloud.tecnico.ulisboa.pt/ and authenticate with ID Tecnico.
- On the Overview page, confirm that the selected project is the correct one. The top bar indicates the selected project:
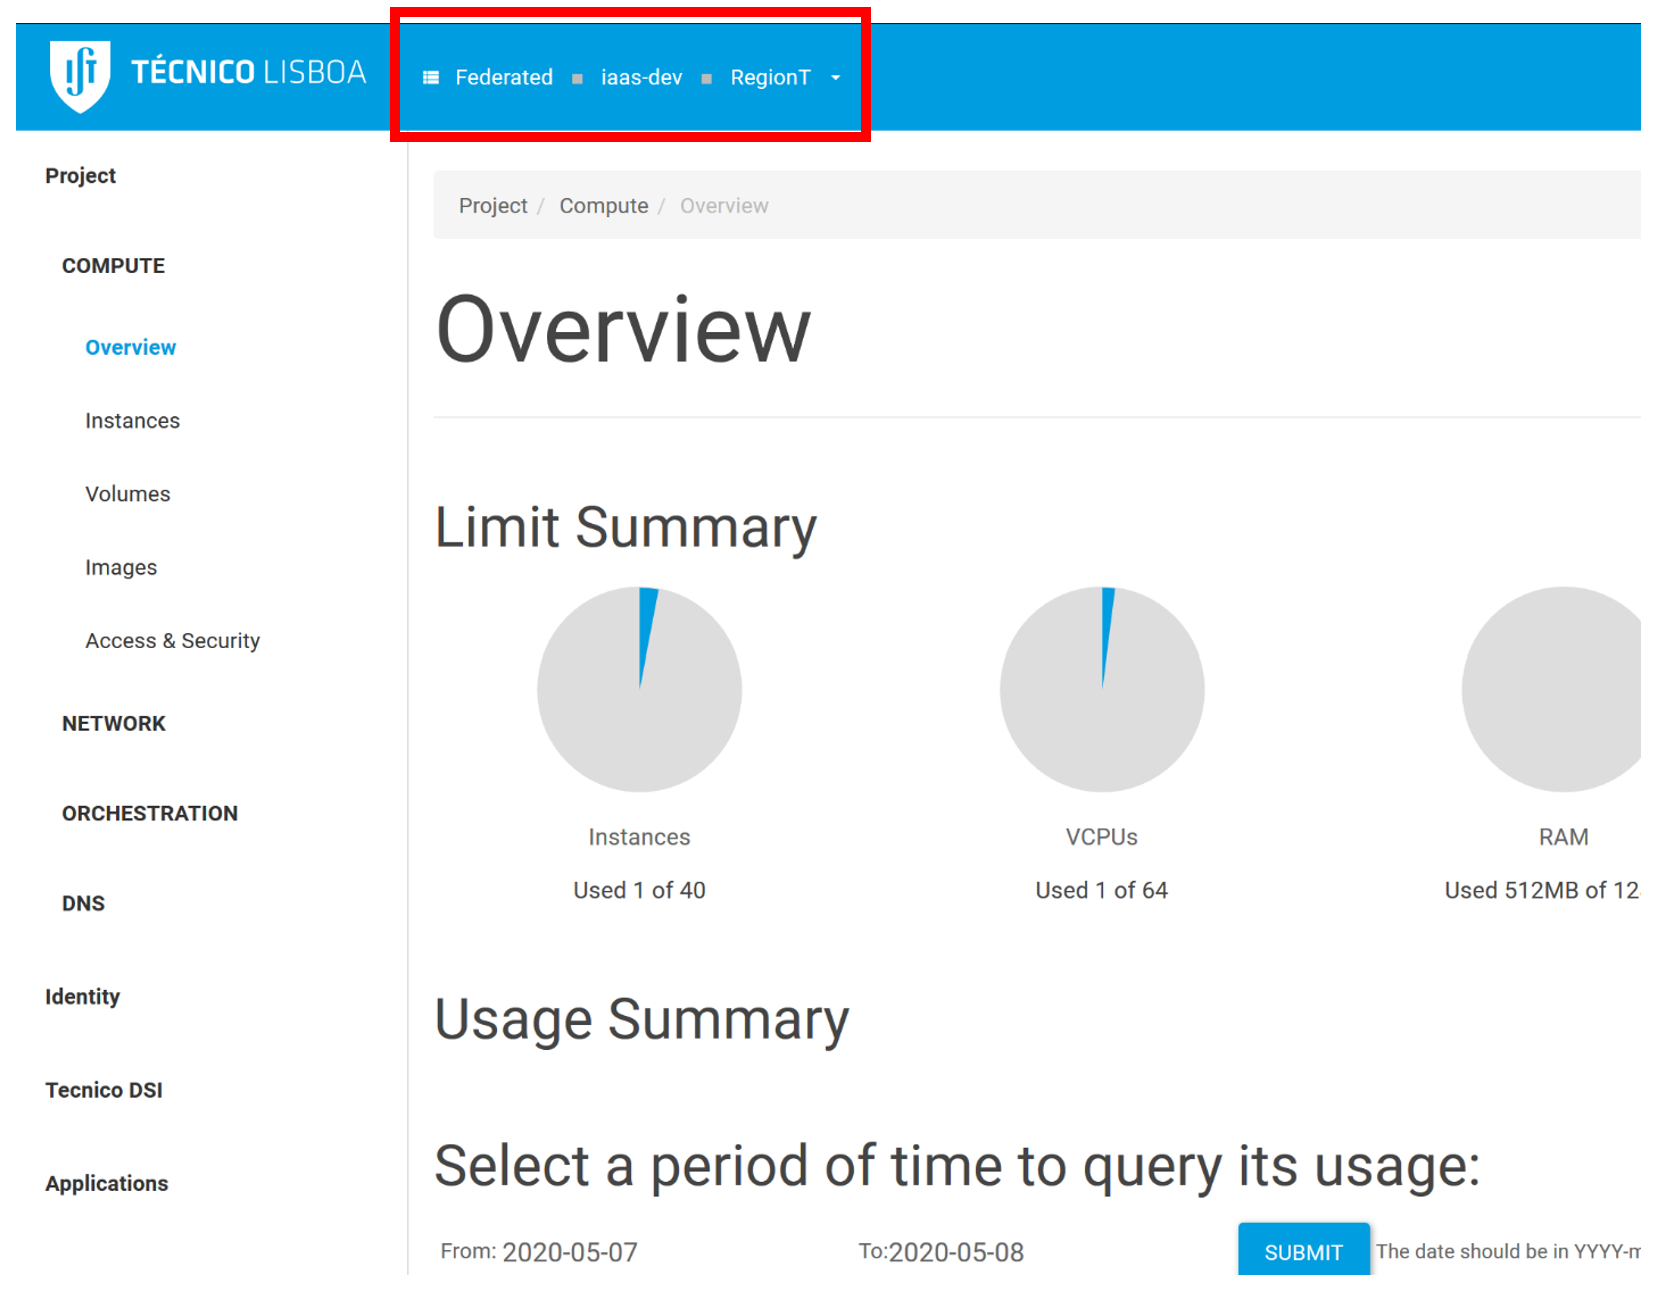
To change the project, click on the area indicated in red on the picture above and choose the wanted project.
-
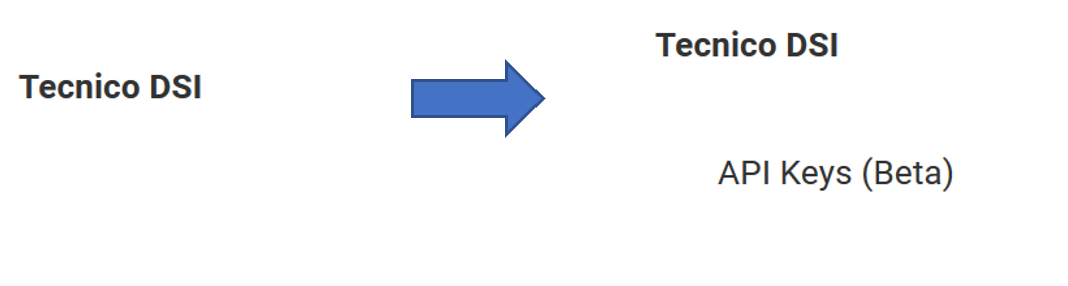
On the side bar, select Tecnico DSI and then API Keys:
-
The information regarding the API key created for the project should appear:
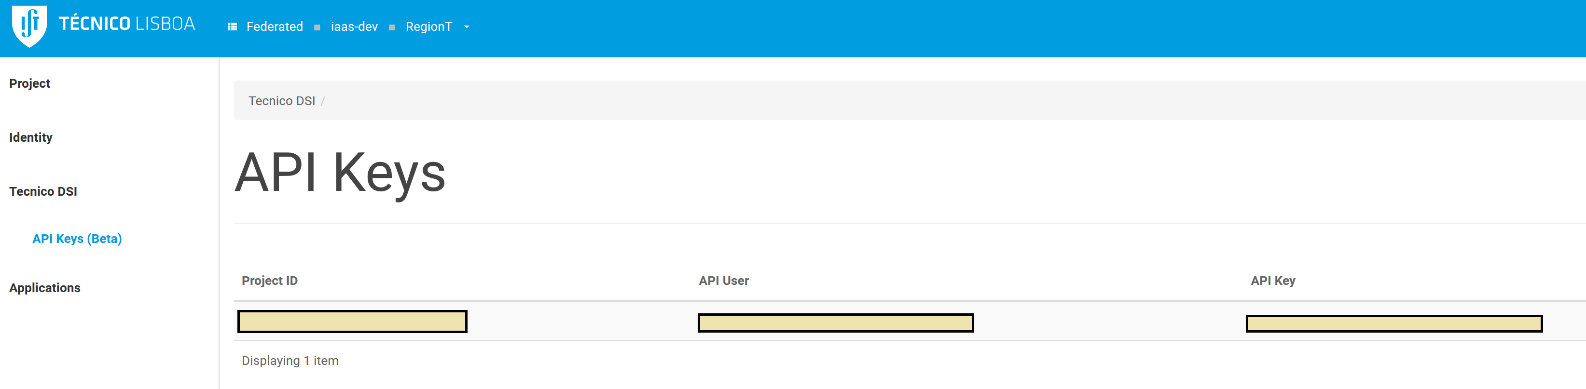 Warning
If a project does not have an associated API key, please request the creation of an API key for the desired project. This is explained in the Getting Started guide.
How to use the API?
You can perform requests via HTTP with your preferred method. If you plan to use a REST client, library or similar, please read this official OpenStack API documentation to understand the workflow when using the VMCloud API.
Otherwise, we advise you to use the official OpenStack command-line client (CLI), which essentially performs API requests from your computer. To install it, you have to have python3 and pip3 installed in your workstation and then you run pip3 install python-openstackclient.
With the information from the API key page, save the following file which setups up the environment variables needed to use the OpenStack CLI:
#!/bin/sh
export OS_AUTH_URL=https://stackcontroller.tp.dsi.tecnico.ulisboa.pt:5000
export OS_IDENTITY_API_VERSION=3
export OS_IMAGE_API_VERSION=2

export OS_PROJECT_DOMAIN_NAME=tecnico-saml
export OS_USER_DOMAIN_NAME=tecnico-apikeys
export OS_REGION_NAME=[RegionT or RegionA]

export OS_PROJECT_ID=[Project ID indicated in the “API Keys” page]
export OS_USERNAME=[API User indicated in the “API Keys” page]
export OS_PASSWORD=[API Key indicated in the “API Keys” page]
Expressions surrounded in [ ] should be replaced by the correct values.
Then run the file to setup the environment variables and test one of the variables:
$ source [FILENAME]
$ echo $OS_AUTH_URL
https://stackcontroller.tp.dsi.tecnico.ulisboa.pt:5000/v3
The terminal is now setup to run OpenStack commands. The source command needs to be run when a new terminal is launched.
How to test the CLI?
You can enter the interactive console just by running the openstack command and then run the sub-commands at your wish. The help sub-command is always recommended. Here are some examples of full commands to test the client:
$ openstack flavor list
+----+-----------+-------+------+-----------+-------+-----------+
| ID | Name      |   RAM | Disk | Ephemeral | VCPUs | Is Public |
+----+-----------+-------+------+-----------+-------+-----------+
| 0  | t1.nano   |   512 |   10 |         0 |     1 | True      |
| 1  | t1.micro  |  1024 |   10 |         0 |     1 | True      |
| 2  | t1.small  |  2048 |   10 |         0 |     2 | True      |
| 3  | t1.medium |  4096 |   20 |         0 |     2 | True      |
| 4  | t1.large  |  8192 |   40 |         0 |     4 | True      |
| 5  | t1.xlarge | 16384 |   60 |         0 |     4 | True      |
+----+-----------+-------+------+-----------+-------+-----------+
$ openstack image list
+--------------------------------------+-----------------------+--------+
| ID                                   | Name                  | Status |
+--------------------------------------+-----------------------+--------+
| 66487b98-deac-44de-9fc6-9f9ef85f6a0e | CentOS-7-Latest       | active |
| a73ecf89-1c4c-49a1-a679-972173d07a58 | CentOS-8-Latest       | active |
| e427adef-3725-4520-acdf-3995ca9d8047 | CirrOS                | active |
| 7a0089f2-978a-42a3-9754-da315e7e6bf1 | Cirros                | active |
| af06a089-3e3b-41f1-9703-ef7f57884b04 | Debian-Buster-Latest  | active |
| 16b3c1bc-1b9a-4c69-89c9-ee80c8576281 | Debian-Stretch-Latest | active |
| de231b93-7e55-4778-90d3-1c0d07cba199 | Debian-Testing-Latest | active |
| b99522dc-f355-4c0c-81f8-63d9f649b3d0 | Ubuntu-Bionic-Latest  | active |
| 2724c566-d354-4e52-89dd-6be5c487acce | Ubuntu-Focal-Latest   | active |
| 4035a39f-b164-41b5-8646-3248b598cb88 | Ubuntu-Xenial-Latest  | active |
+--------------------------------------+-----------------------+--------+
If a missing value or unauthorized error is returned by any of these two commands, then please check your environment variables in your terminal.
If your project exists in both regions, then you can use the --os-region flag to quickly run commands for the specific region or change the OS_REGION_NAME environment variable with the export OS_REGION_NAME=RegionA command. In this example, the OS_REGION_NAME variable was set to RegionT.
$ openstack security group list
+--------------------------------------+---------+------------------------+----------------------------------+------+
| ID                                   | Name    | Description            | Project                          | Tags |
+--------------------------------------+---------+------------------------+----------------------------------+------+
| fyyyyyy6-822c-457e-9d3c-yyyyyyyyyy1f | default | Default security group | 818xxxxxxxxxxxxxxxxxxxxxxxxxx8ff | []   |
+--------------------------------------+---------+------------------------+----------------------------------+------+
$ openstack --os-region RegionA security group list
+--------------------------------------+---------+------------------------+----------------------------------+------+
| ID                                   | Name    | Description            | Project                          | Tags |
+--------------------------------------+---------+------------------------+----------------------------------+------+
| 2yyyyyy8-901b-45e4-8f66-yyyyyyyyyy03 | default | Default security group | 818xxxxxxxxxxxxxxxxxxxxxxxxxx8ff | []   |
+--------------------------------------+---------+------------------------+----------------------------------+------+
$ openstack --os-region RegionT security group list
+--------------------------------------+---------+------------------------+----------------------------------+------+
| ID                                   | Name    | Description            | Project                          | Tags |
+--------------------------------------+---------+------------------------+----------------------------------+------+
| fyyyyyy6-822c-457e-9d3c-yyyyyyyyyy1f | default | Default security group | 818xxxxxxxxxxxxxxxxxxxxxxxxxx8ff | []   |
+--------------------------------------+---------+------------------------+----------------------------------+------+
API and CLI Documentation
-
OpenStack API Documentation: https://docs.openstack.org/api-quick-start/index.html
-
OpenStackClient Documentation: https://docs.openstack.org/python-openstackclient/queens/